Installation Guide
How to Install Corten Steel Garden Edging
Published by MetFab Steel · Bayswater, Melbourne
Installing Corten steel garden edging is a straightforward DIY project that produces a professional, long-lasting result. With the right preparation and a few simple tools, most homeowners can complete an edging installation in a day. Here's how to do it properly.
What You'll Need
- Corten steel edging strips and joining stakes
- Rubber mallet or hammer
- Garden spade or flat edging spade
- String line and pegs (for straight runs)
- Garden hose (for curved runs)
- Spirit level
- Work gloves (Corten edges can be sharp after cutting)
Step 1: Mark Out Your Line
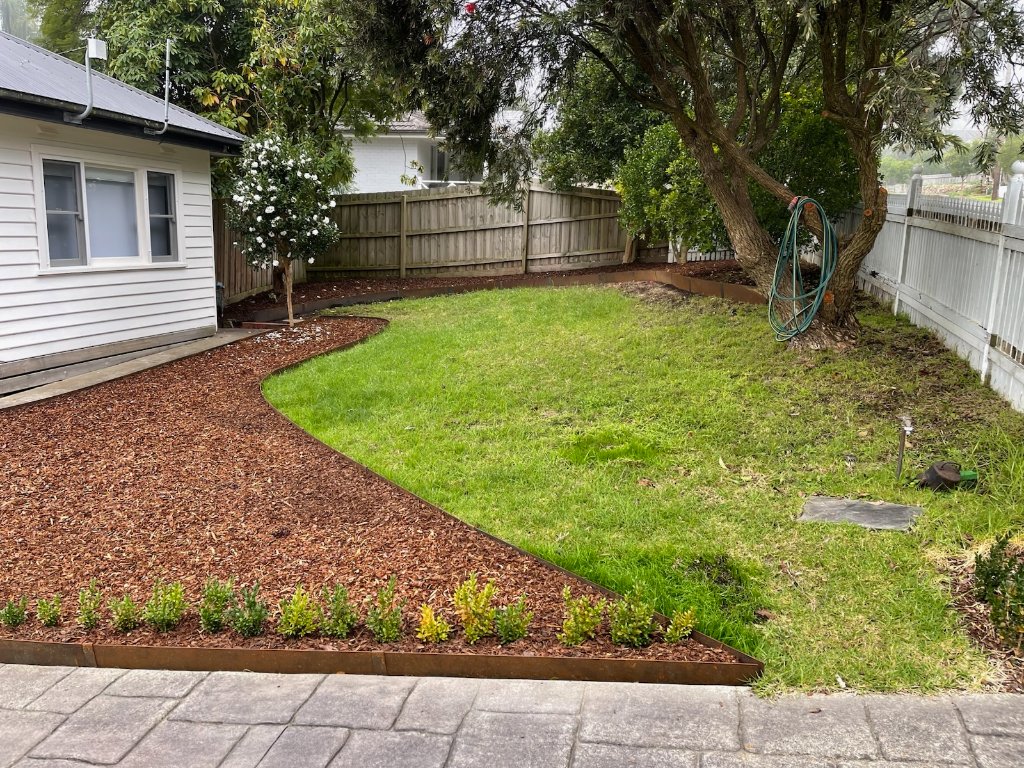
For straight edges, run a taut string line at the desired height above finished grade. For curves, use a garden hose to mark the line on the ground — the hose holds the shape and gives you a visual reference before you start digging.
Take time to get this right. A well-planned line is the difference between a crisp professional result and an edging that looks uneven.
Step 2: Cut a Clean Edge
Using an edging spade or flat spade, cut a clean, vertical slot along your marked line. The slot should be slightly deeper than the height of your edging stake, and just wide enough to accept the edging strip vertically.
For curved sections, make a series of short cuts following the hose line rather than trying to cut a long curve in one pass.
Step 3: Install the First Strip
Place the first edging strip into the slot. The top of the strip should sit at or slightly above finished lawn or garden grade — typically 10–20mm above lawn level for a visible edge, or flush for a more subtle look.
Drive the first stake into the ground using a rubber mallet. Stakes should be positioned so they grip both the edging strip and the surrounding soil firmly.
Step 4: Continue Along the Run
Connect additional strips using the joining stakes or connectors. Ensure each join is tight to prevent gaps where soil can migrate through. On curves, use the natural flexibility of the strip to follow the line — for tighter curves, shorter strips give more control.
Drive stakes every 600–900mm along straight runs, and more frequently (every 300–450mm) on tight curves to hold the curve shape.
Step 5: Backfill and Compact
Once all edging is installed and staked, backfill the slot on both sides with soil, pressing firmly with your foot to compact. This locks the edging in place and prevents movement.
Check levels along the run and adjust as needed before the soil fully settles.
Step 6: Final Touches
Use a stiff brush or broom to remove soil from the face of the edging. Water the area to help the soil settle. Within a few weeks of rain and irrigation, the edging will bed in firmly.
Managing the Initial Staining Period
During the first wet season, fresh Corten edging will weep orange stain onto adjacent pavers, concrete, and lawn. This is normal and expected:
- On pavers or concrete, a diluted oxalic acid wash can remove orange staining.
- On lawn, the staining is temporary and grows out as the patina stabilises.
- After 1–2 seasons, staining essentially stops as the patina becomes stable.
Tips for Best Results
- Install edging before laying new pavers or paths where possible — it's much easier to work before surfaces are poured.
- For very long straight runs, use a laser level rather than a string line for perfect alignment.
- If soil is particularly soft or sandy, longer stakes provide better holding power.
- Wear gloves — the cut edges of steel edging are sharp.
Shop
Related Products
Written by
The MetFab Steel Team
MetFab Steel is a family-run fabrication workshop with over 35 years of experience in structural steel, Corten products, and precision CNC cutting. Our team works hands-on every day with waterjet cutters, welders, and press brakes — so our articles come straight from the workshop floor.